Introduction:
Adobe Photoshop is widely recognized as the premier software choice in the graphic design industry. Whether you’re editing photos, creating digital artwork, or designing web assets, Photoshop offers an extensive toolkit that empowers creativity. At the heart of this powerful software lies its interface and tools — the foundation upon which every graphic designer builds their projects. In this comprehensive guide, we’ll explore the Photoshop interface and the essential tools every graphic designer should know. Whether you’re a beginner or looking to sharpen your skills, understanding the layout and function of Photoshop’s core tools can significantly enhance your workflow and creative output.
1. Understanding the Photoshop Interface:
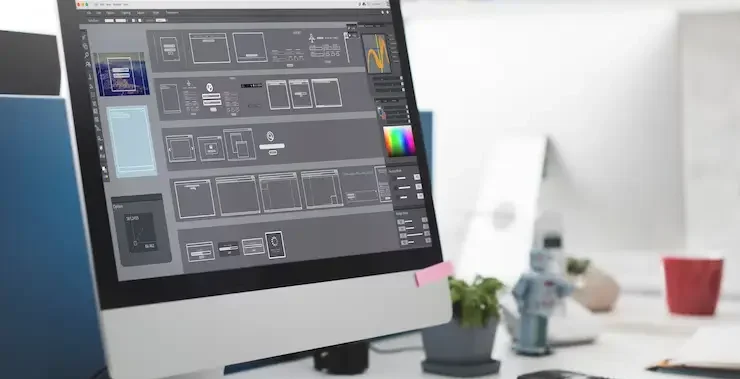
It’s essential to get acquainted with Photoshop’s interface before exploring its vast array of tools. Adobe has crafted an intuitive workspace that balances customization with functionality.
The Menu Bar: Positioned at the top of the screen, the Menu Bar features sections such as File, Edit, Image, Layer, Select, Filter, View, Window, and Help—each housing a collection of relevant tools and functions.
The Options Bar: Situated beneath the menu bar, the Options Bar dynamically updates based on the currently selected tool, presenting settings such as size, opacity, alignment, and style tailored to that specific tool.
The Tools Panel: This vertical bar on the left side of the screen holds all your tools — from selection and painting to text and navigation. Understanding each tool’s function is key to mastering Photoshop.
The Document Window: This is your actual canvas — where you create and edit images. Multiple documents can be opened simultaneously in separate tabs.
Panels and Palettes: To the right of the interface, you’ll find collapsible panels such as Layers, Adjustments, Properties, Color, Swatches, and more. These panels help you manage layers, modify elements, and apply effects.
2. Essential Photoshop Tools for Graphic Designers:
Now let’s explore the core Photoshop tools that are crucial for any graphic design project.
1) Selection Tools:
Selection tools allow designers to isolate parts of an image or design for editing.
- Move Tool (V): Moves selected objects or layers.
- Marquee Tool (M): Creates rectangular, elliptical, single row or column selections.
- Lasso Tools (L): A group consisting of the Lasso, Polygonal Lasso, and Magnetic Lasso, designed for creating precise selections through freehand drawing or edge-based detection.
- Quick Selection Tool (W): Quickly selects areas based on color and texture.
- Magic Wand Tool (W): Selects pixels with similar colors with a single click.
2) Crop and Slice Tools:
These tools help trim or divide images efficiently.
- Crop Tool (C): Used to cut down an image to a specific portion, removing unwanted outer areas.
- Slice Tool (K): Divides an image into smaller sections, often for web use.
3) Retouching and Healing Tools:
Used to enhance or correct images by removing flaws.
- Spot Healing Brush Tool (J): Quickly removes imperfections by automatically merging them with nearby pixel textures for a natural look.
- Healing Brush Tool (J): Uses a source area to repair image areas.
- Clone Stamp Tool (S): Duplicates pixels from a chosen source area and applies them to a different part of the image.
- Patch Tool (J): Fixes specific areas by blending them with nearby pixel data for a seamless repair.
- Content-Aware Move Tool: Moves selected parts of an image and fills the gap intelligently.
4) Painting Tools:
Used for digital painting and color application.
- Brush Tool (B): Applies color with customizable brush tips.
- Pencil Tool (B): Draws hard-edged lines.
- Color Replacement Tool: Replaces selected colors while maintaining texture and shading.
- Mixer Brush Tool: Simulates realistic painting effects by mixing colors.
5) Drawing and Shape Tools:
Crucial for vector-based design and layout.
- Pen Tool (P): Used to draw precise paths and shapes, ideal for crafting detailed selections and vector-based designs.
- Shape Tools (U): Draw rectangles, ellipses, polygons, lines, and custom shapes.
- Custom Shape Tool (U): Access a variety of pre-made vector shapes.
6) Type Tools:
Text is an essential element in most graphic designs.
- Horizontal & Vertical Type Tool (T): Adds text in a horizontal or vertical orientation.
- Type Mask Tool: Creates selections in the shape of text.
- Character & Paragraph Panels: Offer control over text properties such as font style, size, spacing, alignment, and additional formatting options.
7) Navigation Tools:
These help you zoom and move around your canvas.
- Zoom Tool (Z): Zooms in and out of the document.
- Hand Tool (H): Moves the canvas without changing zoom level.
3. Layers and Layer Management:
Layers are the backbone of non-destructive editing in Photoshop. Every new element, whether it’s text, shape, or brush stroke, can exist on its own layer.
Types of Layers:
- Normal Layers: Contain images, graphics, or color fills.
- Adjustment Layers: Apply non-destructive adjustments like brightness, contrast, hue, and saturation.
- Text Layers: Created when adding text.
- Shape Layers: Vector shapes with editable paths.
Layer Features:
- Blending Modes: Define how a layer’s content visually combines with the elements on layers below it.
- Opacity & Fill: Adjust transparency.
- Layer Masks: Allow parts of a layer to be hidden or revealed selectively.
- Smart Objects: Enable non-destructive transformations and filters.
Effective layer management — using groups, naming conventions, and color coding — is vital for large or complex projects.
4. Advanced Features for Designers:
While the basics cover most needs, Photoshop also includes advanced tools for more creative freedom:
- Smart Filters: Apply filters (like blur or sharpen) non-destructively to smart objects. You can adjust or remove them at any time.
- Adjustment Layers: These include tools like Curves, Levels, Gradient Maps, and Color Balance that change image properties without affecting the original.
- Actions and Automation: You can record repetitive tasks as “actions” and apply them to other files automatically.
- Layer Styles: Add effects like drop shadows, strokes, glows, bevels, and overlays with a few clicks.
- Creative Cloud Integration: Photoshop seamlessly integrates with other Adobe tools like Illustrator, InDesign, XD, and Lightroom, making it easy to move assets between programs.
5. Tips for Working Efficiently in Photoshop:
Learn Keyboard Shortcuts: Memorizing shortcuts can drastically speed up your workflow.
- Use Smart Objects: They preserve quality and allow for non-destructive editing.
- Leverage Layer Masks: Instead of deleting parts of an image, mask them to keep flexibility.
- Organize Layers: Name and group layers to stay organized, especially in large projects.
- Customize Your Workspace: Tailor your panels and tools to your specific needs.
Conclusion:
Mastering the Photoshop interface and tools is essential for anyone pursuing a career in graphic design. With its rich feature set and limitless potential, Photoshop enables designers to bring their visions to life — whether that means crafting a sleek logo, retouching a photo, or building a multi-layered digital composition.
While the learning curve may seem steep at first, consistent practice and exploration will help you unlock the full power of Photoshop. As you grow more comfortable with its interface and tools, you’ll discover that Photoshop isn’t just software — it’s a creative companion.
Also Read: Working with Layers Basics