Introduction:
In the world of graphic design, colors do more than just decorate — they communicate. A poorly corrected image can throw off an entire composition, distort branding, or undermine the clarity of a visual message. That’s why mastering color correction tools is a critical skill for any serious graphic designer.
From enhancing product photos to refining illustrations or prepping designs for print and digital platforms, color correction ensures visual accuracy and creative impact. This comprehensive guide will walk you through the essentials of color correction in graphic design — what it is, why it matters, and how to master the tools available in your software arsenal.
What is Color Correction in Graphic Design?
Color correction in graphic design refers to the process of adjusting an image’s or visual element’s color properties to ensure they appear balanced, accurate, and visually consistent with the design’s goals. Unlike color grading, which adds creative tones or moods, color correction focuses on fixing technical imperfections — like improper white balance, color casts, flat contrast, or inaccurate hues.
Why It Matters:
Brand Consistency: Accurate brand colors across all materials.
Professionalism: Balanced images enhance perceived quality.
Clarity: Correct contrast and saturation improve readability.
Accurate Printing: Guarantees that on-screen designs retain their intended colors and quality when transferred to print media.
Understanding the Color Theory Basics:
Before diving into tools, a foundational understanding of color theory is crucial. In graphic design, you’re not just correcting colors to look “natural” — you’re correcting them to fit a design system.
Key Concepts:
RGB vs. CMYK: RGB is tailored for digital visuals, while CMYK caters to print outputs — both require unique color adjustments suited to their platform.
Hue, Saturation, Brightness (HSB): define color properties — hue indicates the shade, saturation controls vividness, and brightness sets lightness.
Color Harmony: Complementary, analogous, triadic — use these schemes to guide your corrections.
Color Psychology: Color influences mood and perception, making it a vital element in branding, advertising, and product packaging strategies.
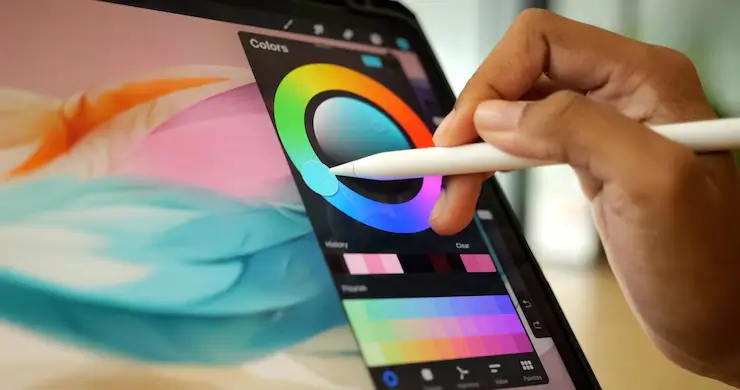
Essential Color Correction Tools in Graphic Design Software:
Whether you’re using Photoshop, Illustrator, Affinity Photo, or CorelDRAW, most professional design tools include similar correction features. Here are the key tools every designer should master:
1. White Balance Adjustments:
Corrects color temperature and tint to neutralize unnatural lighting.
Useful in correcting images shot under fluorescent or mixed lighting.
Where to find it:
- Photoshop: Camera Raw Filter > White Balance
- Affinity Photo: Develop Persona > White Balance
- Illustrator: Recolor Artwork (for illustrations)
2. Levels and Curves:
Levels: Adjust black, mid, and white points. Useful for contrast correction.
Curves: Offers precision control over tonal ranges (shadows, midtones, highlights) in RGB or individual color channels.
Pro Tip: Use the Gray Point Eyedropper in Levels to remove color casts instantly.
3. Hue/Saturation:
Adjust the overall or selective saturation of colors.
Useful for muting oversaturated reds or enhancing dull blues.
Advanced Tip: Use the drop-down menu in Photoshop’s Hue/Saturation panel to target specific colors (e.g., only yellows).
4. Color Balance:
Modify tones in shadows, midtones, and highlights by adjusting red/cyan, green/magenta, and blue/yellow channels.
Ideal for correcting odd skin hues or unwanted color casts caused by lighting conditions.
5. Selective Color:
Precisely tweak individual colors without affecting others.
Excellent for matching brand colors, tweaking product hues, or isolating design elements.
6. Gradient Maps:
Maps grayscale values to specific color ranges.
Ideal for stylized poster design or creating consistent themes across compositions.
7. Blend Modes and Adjustment Layers:
Use Soft Light, Overlay, or Color blending modes on adjustment layers for non-destructive corrections.
Combine with masks to isolate corrections to specific parts of your layout.
Color Correction Workflow in Graphic Design:
To streamline your design process, follow a structured workflow. Here’s a simplified color correction pipeline suited for graphic design tasks:
Step 1: Calibrate Your Monitor: If your screen isn’t displaying colors accurately, no amount of correction will help. Use tools like Datacolor Spyder or X-Rite Calibrite to ensure you’re seeing true colors.
Step 2: Assess and Identify the Issues: Ask:
- Is the image too warm/cool?
- Are any colors oversaturated?
- Are shadows or highlights crushed?
Begin your assessment by referencing histograms, sampling with eyedroppers, and reviewing details in the info panel for accuracy.
Step 3: Correct Exposure and Contrast First: Poor lighting affects color perception. Use Levels or Curves to correct tonal values before adjusting colors.
Step 4: Balance Color Temperature: Adjust white balance by using sliders or the eyedropper tool, targeting neutral white or gray areas in the image as a reference point.
Step 5: Fine-Tune Colors: Use Hue/Saturation, Color Balance, and Selective Color to refine the look. Stick to the project’s visual theme.
Step 6: Apply Global and Local Adjustments: Use masks or vector shapes to isolate corrections to specific areas. For example, lighten the subject’s face without affecting the background.
Real-World Graphic Design Applications:
Branding and Identity Design: Maintaining consistent color accuracy across all visual assets is essential for brand recognition. Use color correction to match and standardize logos, headers, and product imagery.
Marketing Materials and Ads: Correcting contrast and saturation in social media banners or print brochures ensures your message stands out.
Product Mockups: Photographed mockups often need color correction to reflect the final product’s real-life color accurately.
Web UI Design: Icons and interface graphics must be color-balanced to ensure accessibility and legibility, especially across different devices.
Pro Tips to Master Color Correction in Graphic Design:
Use Non-Destructive Editing: Work with adjustment layers, smart objects, or linked files to keep original assets untouched.
Check Across Devices: Export mockups and view them on mobile, tablets, and different monitors to verify color consistency.
Use Color Profiles: Assign appropriate color profiles (sRGB for web, CMYK for print) before final export to avoid shifts.
Utilize Color Palettes: Tools like Adobe Color, Coolors, and Colormind help guide your design with harmonious tones.
Create a Reference Board: Use mood boards with sample images that align with your project’s tone. They serve as visual anchors during color correction.
Conclusion:
In graphic design, color correction isn’t just a technical task — it’s a creative responsibility. It ensures your work communicates the right mood, message, and brand identity. By understanding how colors interact, and by mastering tools like Levels, Curves, HSL, and Selective Color, you can bring clarity, vibrancy, and professionalism to every design you produce.
So whether you’re fixing a model’s skin tone, matching a logo’s hue, or balancing a web banner’s contrast, color correction puts you in control of your visual message. The more you practice, the sharper your eye becomes — and soon, you’ll not only be correcting colors, but mastering them like a true design pro.
Also Read: Professional Poster Design Techniques